Learn how these essential processes work, why they matter, and how you can use them to improve your network management.
The networking landscape of the future will be more complex to navigate than ever before. The global cost of cybercrime is estimated to reach 15.63 trillion U.S. dollars in 2029, following a continuous increase over the prior 16 years. Global data creation is set to reach more than 180 zettabytes in 2025, up from 64.2 zettabytes in 2020. And the proliferation of AI is unavoidable – according to Gartner, “by 2029, 10% of global boards will use AI guidance to challenge executive decisions that are material to their business.”
To keep ahead of these trends and prevent negative impacts to their bottom line, effective network management is essential – and taking proactive steps to achieve and maintain network compliance will become more critical than ever. But how do you achieve effective network management if you don’t know which assets are on your network?
Network discovery and auditing play a key role in achieving compliance, fortifying security, increasing operational resilience, and ensuring business continuity. The repository of information you gather from automating your discovery and auditing provides what is known as a Network Source of Truth (NSoT) – a central data repository you can use to effectively manage and configure your entire network.
In this complete guide to discovery, auditing, and compliance, we’ll review the key functions of network discovery and auditing, how they work together to achieve compliance, and why you should use a tool like Open-AudIT for these processes.
Table of Contents
What is network discovery?
Discovery is your foundation to achieving compliance and effectively managing your network. Network discovery simply refers to the process of identifying all devices and components connected to your business network, creating a comprehensive inventory of assets including hardware devices, software applications, and services.
Network discovery typically involves various methods like running scripts (like Python, Powershell, or Bash) and sending ping requests, SNMP queries, or port scans to detect and examine network components. As a result, teams can collect data on device types, versions, connections, access controls, usage patterns, and more.
Performing regular network discovery pulls back the curtain to offer network teams several capabilities they didn’t have before:
- Achieve compliance: Access to regularly updated and recorded network inventory is the first step to maintaining compliance with industry regulations and standards (more on this soon).
- Effectively allocate resources: Optimize network performance and costs by identifying underutilized resources and balancing resource allocation.
- Keep devices up to date: Ensure each network device has the latest software and device versions to patch vulnerabilities and protect data from end to end.
- Asset management: Get a comprehensive inventory of all network devices, applications, and services, enabling better asset tracking and management. This includes end-of-life hardware, operating systems, and software, as well as greenfield and brownfield devices.
- Security monitoring: By identifying unauthorized devices or unwanted user permissions through methods like firewall service monitoring and Windows security dashboards, network discovery enhances network security and prevents cyberthreats
- Troubleshooting: With a detailed map of the network topology and connected devices, administrators can more easily diagnose, resolve, and prevent network issues.
Network discovery is a fundamental process that equips IT professionals with a comprehensive understanding of their network infrastructure, enabling them to manage, secure, and optimize their networks more effectively through auditing.
What is network auditing?
While discovery simply “finds” what’s on your network, auditing is the process of interrogating this information to evaluate and assess the security, performance, and compliance of your network. Teams can do this by filtering their discoveries using custom parameters to explore almost anything they could want to know.
Network audits produce reports which can (and should) be kept for business records; they can also be used to track changes in your network over time. The information collected in discovery can be used to generate audit reports like:
- Asset inventory snapshot: Record a comprehensive list of network-connected devices, systems, and assets including servers, routers, switches, printers, IoT devices, and end-user devices like employee workstations.
- Network topology map: See how devices on your network are connected to each other.
- Device configuration: Capture the configuration details of network devices like firewalls, switches, and routers, and track configuration changes over time.
- Access control: Check user permissions and access levels across your devices and software to manage internal threats.
- Security vulnerabilities: Find outdated software, open ports, weak passwords, or insecure protocols such as Telnet.
- Traffic and bandwidth usage: Check bandwidth usage across different parts of the network and identify congestion points.
- Compliance status report: Check your network’s compliance against industry regulations or standards like GDPR, HIPAA, or PCI-DSS, ACSC Essential Eight, or CIS.
Conducting regular network audits is crucial for business continuity as it helps organizations maintain a secure and compliant network infrastructure. By identifying and addressing potential issues proactively, you can mitigate risks, prevent data breaches, and avoid costly downtime or regulatory penalties.
What is network compliance?
While there are plenty of other benefits to managing your network through effective discovery and auditing, network compliance is the main reason you should do so.
Achieving network compliance means adhering to relevant regulations and standards that maintain data integrity, privacy, and security, among other things. Compliance is a non-negotiable part of network management, and the trust of customers, investors, and partners can hinge on an organization’s ability to meet their industry’s regulatory standards.
Organizations should remain vigilant about their compliance to meet legal and regulatory requirements, avoiding hefty fines and reputational damage. The regulatory frameworks your organization is required to comply with (if any) depend on your industry and region/s of operation, and will almost always include data security measures.
You may have internal regulations to consider, too – for example, perhaps you work for an enterprise that also enforces its own set of data privacy rules.
Using network discovery and auditing, businesses can achieve compliance by:
- Identifying applicable regulations based on the organization’s industry, location, and data handling practices.
- Conducting regular network audits that identify potential vulnerabilities and areas of non-compliance in accordance with these regulations.
- Implementing security controls and fixes to address identified risks and stay compliant with relevant regulations.
- Continuously monitoring the network for compliance violations and security incidents.
- Producing compliance status reports that check against industry regulations and that serve as a record for compliance verification.
- Maintaining detailed documentation and audit trails over time for change tracking and compliance audits.
How discovery, auditing, and compliance work together
Each of these processes strengthens the others: discoveries provide visibility, audits assess security and compliance, and together, they enable organizations to maintain compliance in a structured, thorough way. Network compliance, in turn, relies on accurate discovery data to ensure accurate audits and ongoing alignment with security policies.
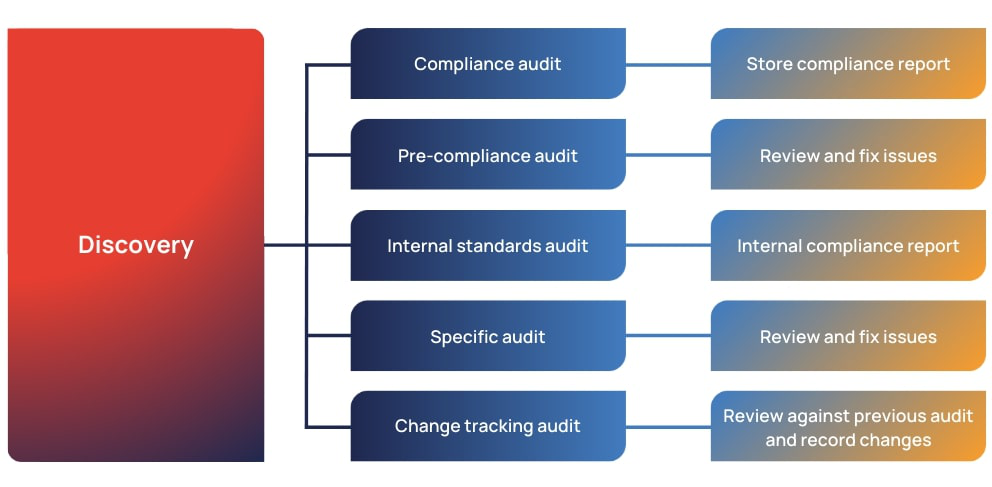
When you run a network discovery, you can run several audits from that discovery for the purposes of:
- Storing compliance reports
- Reviewing and fixing issues to maintain compliance
- Checking against internal standards
- Tracking changes over time
- Focusing on a specific part of your network, like bandwidth distribution or hardware warranty status.
Why discovery, auditing, and compliance matter
Would you trust a healthcare provider that wasn’t HIPAA-compliant, a utilities provider that wasn’t NERC-compliant, or a bank that wasn’t PCI DSS-compliant? Would you just hope your personal data was safe and these services didn’t go down, or would you take your business somewhere else?
As networks grow more complex, the processes of discovery and auditing are the ultimate way to not just achieve compliance, but also achieve a profitable business.
Every organization should take compliance seriously, as failure to achieve it can result in:
- Costly fines from regulators
- Legal liabilities, including potential lawsuits
- Long-term reputational damage
- Increased government scrutiny
- Interrupted business operations
- Loss of trust from customers and investors.
On a broader level, the consequences of not managing your network can also lead to:
- Cyberattacks from network vulnerabilities, outdated software and devices, or unauthorized network access
- Ballooning costs due to unchecked network inefficiencies
- Performance issues due to lack of visibility over usage patterns, traffic, and bandwidth
- Poor resource allocation, leading to bottlenecks and underutilized resources
- Difficulty diagnosing and resolving network issues, increasing mean time to resolution and causing downtime, latency, jitter, and impaired user experience
- Challenges managing and integrating your network as you add service providers, locations, and automations over time.
There’s no need for your team to perform manual discoveries and audits. In fact, we advise against it – manual audits are prone to oversights and inconsistencies, and can be incredibly time-consuming.
Instead, automating network discovery processes with a tool is an easy way to provide your business with a NSoT. A NSoT allows you to check and validate your network performance and take complete control of your network management.
As a result you’ll save time and resources, improve reliability, and allow for proactive issue resolution. This efficiency boost has a ripple effect across your entire organization, reducing operational hiccups, minimizing downtime, and speeding up time to market.
You can automate and customize your network discoveries to make sure nothing is missed by using a purpose-built tool.
Discovery, auditing, and compliance tools
Effective network management requires a tool that can integrate with your network, scan for devices, store configurations and other information, and generate insights for auditing and decision-making.
You can ensure you choose the best tool for your organization by checking it offers:
- the ability to run scheduled and unscheduled discoveries
- information displayed in a detailed, customizable dashboard
- extensive vendor support
- multiple different audit report options
- integration with existing infrastructure and security solutions
- the option to audit against industry benchmarks for easy compliance.
These features give you the ability to keep your network compliant with minimal effort, as well as the flexibility to effectively manage your network as it becomes more complex.
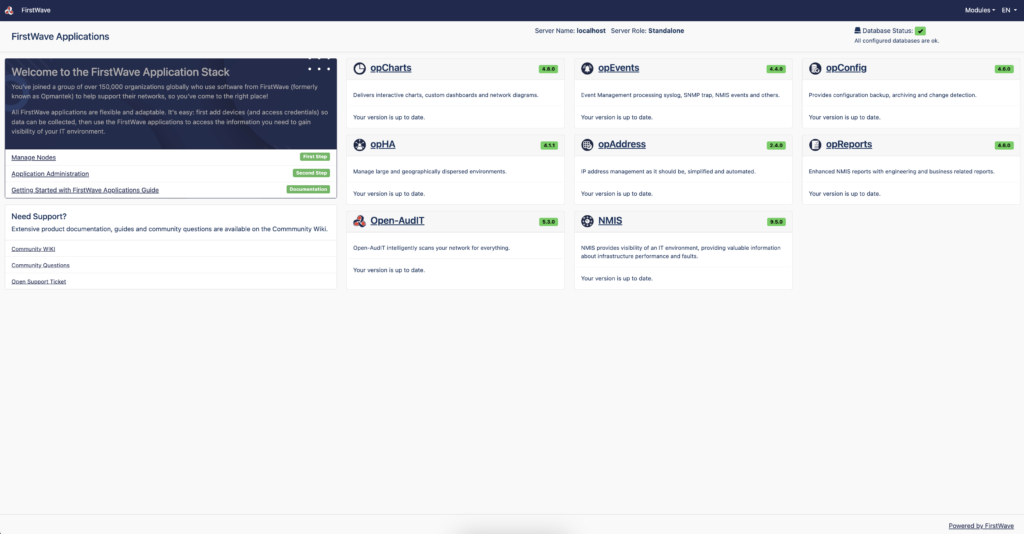
Achieve network compliance with Open-AudIT
With intelligent discovery, auditing, and compliance features, FirstWave’s Open-AudIT gives you complete and cost-effective visibility and control of your network, enabling you to manage your assets and achieve compliance effortlessly. Plus, with the Community Edition, it’s free to get started (with the option to purchase additional functionality).
When you use Open-AudIT, you’ll get features like:
- Accurate device discovery: Run automated or unscheduled discoveries, including SSH and SNMPv3, to get detailed records on all network-connected devices. Dive deeper with the ability to filter for devices within certain parameters (for example, within an IP address range).
- Complete coverage: Set up local collectors on air-gapped parts of your network or across different geographic locations, so you don’t miss a thing.
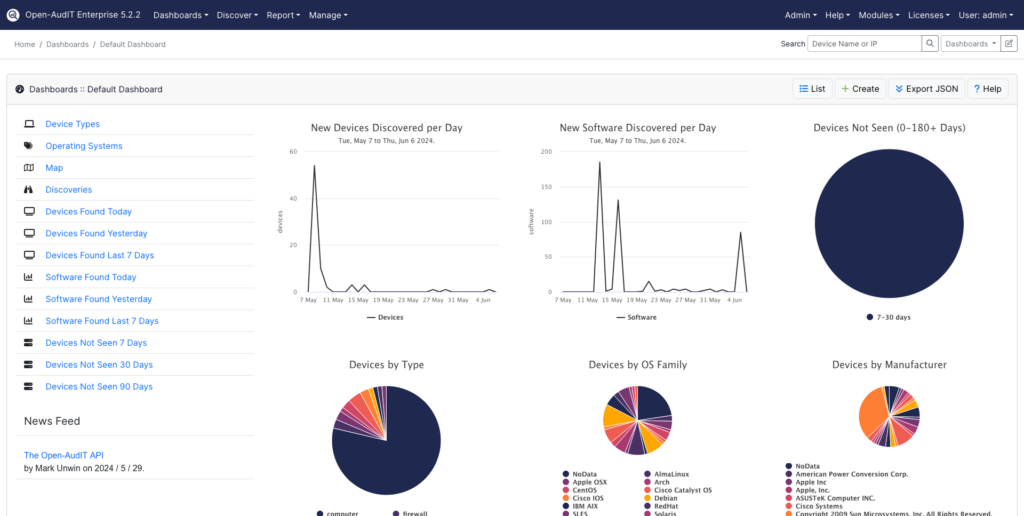
- Detailed dashboards: Explore anything you could want to know about your network with Open-AudIT’s extensive dashboards, giving you the ability to visualize your discovery data any way you like.
- Extensive reporting: Filter and export discovery data to more than 80 different types of reports, making it easy to scrutinize devices, user permissions, software and hardware versions, connection information, and much more.
- Benchmark standards and policies: If you use Open-AudIT Enterprise, you can easily achieve compliance with custom benchmarks. Choose from our long list of included industry standards or set custom benchmarks based on your organization’s own security policies.
- Seed discoveries: Get a complete snapshot of your network by running a seed discovery—a sequence of discoveries run from a single “seed” router to build an extensive picture of every device on your network—to get a thorough bird’s-eye view.
- Shadow IT protection: Open-AudIT helps you identify unauthorized devices or malicious activities on your network, known as shadow IT, through continuous network monitoring. Plus, if your organization has blacklisted software, you can customize Open-AudIT to notify you if this software is discovered.
- Change tracking: Open-AudIT tracks changes to specific device attributes, including installed software, hardware, and settings, so you can easily audit changes over time.
- Role-based access control (RBAC): Get granular control over user permissions to filter and limit access to sensitive network data, reducing the risk of insider threats.
Install Open-AudIT in under 10 minutes with our quick guide.
Unlike most competitors, FirstWave’s agile team of development experts use their deep industry knowledge to offer each customer hands-on support for all FirstWave solutions.
Effective network management through discovery, auditing, and compliance is crucial for business success. Open-AudIT provides these capabilities in a user-friendly, comprehensive platform that will grow with your business.